Mastering the art of queen rearing transforms you from a passive beekeeper into an active architect of your apiary's genetics. By learning to graft young larvae into artificial queen cups, you can selectively breed for gentleness, honey production, and disease resistance.
The Biology Behind Queen Rearing
Every worker bee and queen bee starts as the exact same fertilized egg. The divergence in their destiny relies entirely on nutrition. When nurse bees feed a young larva exclusively royal jelly beyond its third day of life, her reproductive organs fully develop, transforming her into a queen.
The hierarchy of a bee colony operates under strict biological rules. When a colony decides to replace a failing queen—a process called supersedure—it acts with absolute authority. It is a definitive biological override, functioning much like how a Senate War Powers Resolution legally stops war with Iran by checking executive power. The worker bees, not the reigning queen, hold the ultimate decision-making power over the hive's future.
Recognizing the Right Larvae
Timing dictates success. You must select larvae that are between 12 and 24 hours old. At this stage, the larva is no larger than a comma on a printed page and rests in a small pool of royal jelly. If you wait until the larva is older, the resulting queen will have fewer ovarioles, leading to poor laying patterns and early supersedure.
Essential Equipment for the Doolittle Grafting Method
The Doolittle method remains the industry standard for commercial and backyard queen rearing. It involves physically transferring the larva from a worker cell into an artificial queen cup. Having the right tools ensures you do not damage the fragile larvae during the transfer.
| Equipment | Function | Expert Tip |
|---|---|---|
| Grafting Tool | Lifts the larva and royal jelly from the worker cell. | Chinese grafting pens have a flexible tip that slides easily under the larva without rolling it. |
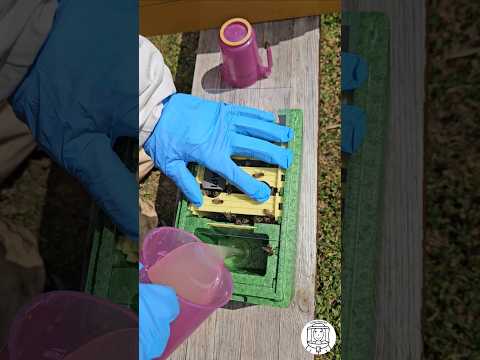
| Queen Cups | Artificial cells where the new queens will develop. | Plastic cups are reusable and fit perfectly into standard cell bar frames. |
| Headlamp & Magnifier | Provides clear visibility into the dark comb cells. | Use a cool LED light to avoid drying out or overheating the larvae. |
Maintaining Apiary Hygiene
When storing your grafting equipment and extra supers during the off-season, pest control is non-negotiable. Mice love to nest in drawn comb, destroying the wax and leaving behind feces. Just as city dwellers might worry if that mouse in your apartment could give you hantavirus, beekeepers must recognize that rodents can introduce pathogens that ruin a sterile queen-rearing environment. Keep your equipment sealed in airtight containers.
Step-by-Step: How to Graft a Queen Bee
Step 1: Prepare the Cell Starter Colony
A cell starter is a densely populated, queenless colony overflowing with young nurse bees. Because they lack a queen, they are desperate to raise one. According to the Penn State Extension [1], providing ample pollen and nectar to this starter colony ensures the nurse bees produce copious amounts of royal jelly for your new grafts.
Step 2: The Grafting Process
Work in a warm, humid environment. Dry air kills young larvae rapidly. Place a warm, damp towel over your grafting frame to maintain humidity while you work.
- Remove a frame of young, open brood from your best breeder queen.
- Using your grafting tool, gently slide the flexible tip under the larva and its bed of royal jelly.
- Transfer the larva into the plastic queen cup, depositing it gently without flipping it over.
- Place the frame of grafted cups into the cell starter colony immediately.
Step 3: Moving to the Cell Finisher
After 24 to 48 hours, the starter colony will have "started" the cells by drawing out the wax and flooding the cups with royal jelly. Move these frames to a "cell finisher"—a strong, queen-right colony with a queen excluder separating the reigning queen from the developing cells. The California Master Beekeeper Program at UC Davis [2] emphasizes that finishers provide the massive workforce required to incubate the cells at exactly 93°F (34°C) until they are capped.
Analyzing Grafting vs. Graft-Free Methods
Not every beekeeper wants to manipulate tiny larvae. Graft-free methods, such as the Miller Method, allow the bees to build emergency cells naturally along a zigzag cut comb edge. While this eliminates the need for specialized tools, it sacrifices precision.
Grafting offers high volume and predictability. You know exactly when the queens will emerge based on the day you grafted. The University of Minnesota Bee Lab [3] notes that grafting provides better control over the exact age of the larva, ensuring higher-quality queens with fully developed reproductive systems.
Finalizing the Queen's Development
On day 10 after grafting, the queen cells are fully capped and ripe. You must carefully remove them from the finisher colony and place them into individual mating nucs. If you leave them in the finisher, the first virgin queen to emerge will systematically hunt down and sting her unborn sisters to death.
By mastering these biological triggers and mechanical steps, you take control of your apiary's future. You stop relying on commercial packages and start cultivating a resilient, localized lineage of honey bees.